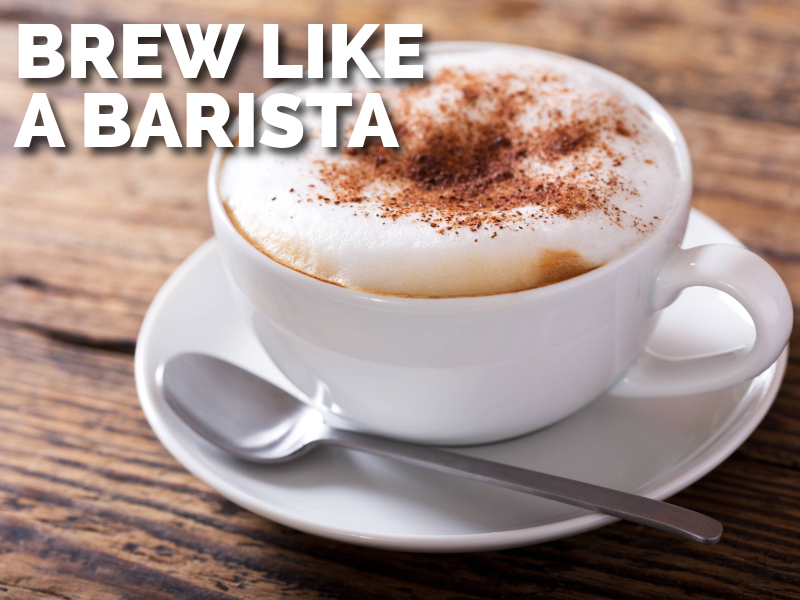
If you’re ready to elevate your home espresso game, the Breville Barista Touch makes it easier than ever with its touchscreen interface and customizable settings. In this guide, we’ll walk through the machine’s standout features and provide step-by-step instructions to make the perfect Espresso, Americano, and Cappuccino using Peet’s Major Dickason’s Dark Roast beans.
This post contains affiliate links. If you click through and make a purchase, I may earn a small commission at no extra cost to you.
Thank you for supporting The Amore Life
Elevating the Coffee Game
An espresso machine is a must-have for coffee lovers who crave rich, bold flavor and barista-level quality at home. Unlike standard drip coffee makers, an espresso machine uses high pressure to force hot water through finely ground coffee beans, producing a concentrated shot of coffee with a layer of crema on top. Owning one allows you to craft café-quality drinks like espresso, cappuccino, or lattes right from your kitchen, saving time and money in the long run. Whether you’re after convenience, customization, or the simple joy of the brewing ritual, an espresso machine is the key to unlocking the full potential of your coffee beans.
It was time I “elevated” my coffee game. I wrote an article about my coffee journey, but this article is about the Breville Barista Touch and how to use it.
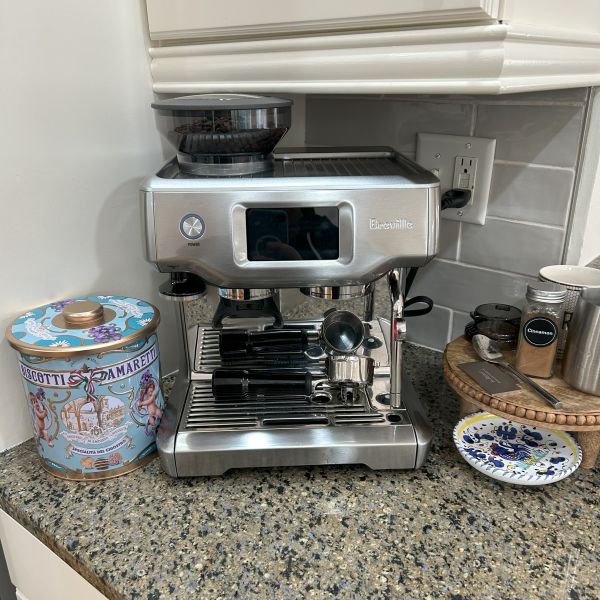
Why the Breville Barista Touch?
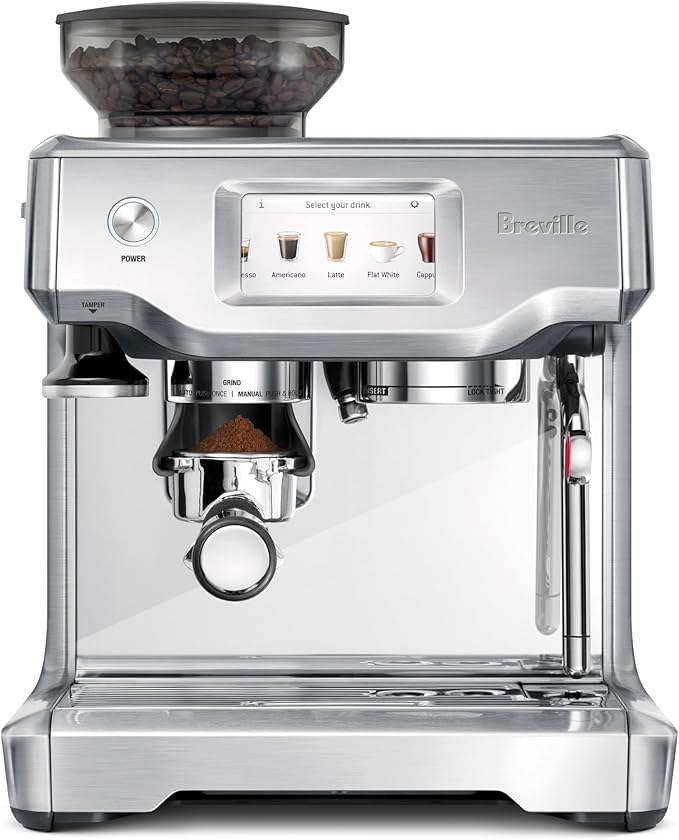
The Breville Barista Touch is a semi-automatic espresso machine that bridges the gap between beginner and pro. It’s known for its intuitive touchscreen interface, built-in conical burr grinder, automatic milk steaming wand, and the ability to customize drink profiles. It heats up in 3 seconds thanks to Breville’s ThermoJet system.
I did some research on different machines, but majority of the reviews and recommendations kept coming back to the Breville. I also did not want to spend a lot of money and found this machine on sale a few weeks ago so I dove in.
Key features include:
- Touchscreen control for intuitive drink selection and customization.
- Integrated grinder with dose control for freshly ground beans.
- Automatic milk texturing with adjustable temperature and foam level.
- Custom drink settings for storing preferences.
- ThermoJet heating system for fast startup.
The Breville Barista Touch delivers third wave specialty coffee at home using the 4 keys formula and is part of the Barista Series that offers all in one espresso machines with integrated grinder to go from beans to espresso in under one minute
Unboxing and Setting Up the Breville Barista Touch
Unboxing is probably the second most fun part of the Breville Barista Touch. It comes with a lot of parts that look intimidating at first, but everything has its function and place.
Stuff in box
- Stainless steel milk jug
- Cleaning disc
- Cleaning tablets
- Dual Wall filter baskets (1 cup & 2 cup) Use with pre-ground coffee.
- Single Wall filter baskets (1 cup & 2 cup) Use when grinding fresh whole coffee beans.
- Water filter and holder
- Cleaning brush
- The Razor™ precision dose trimming tool
- Steam wand cleaning tool
- Water hardness test strip
- Descaling power
- The Dosing Funnel™ 54
After you lay everything out and remove all of the labels and packaging, you can begin assembling and getting the machine ready for use.
Water filter installation
- Remove the water filter and water filter holder from the plastic bag.
- Soak the filter in cold water for 5 minutes.
- Wash the filter holder with cold water.
- Set the reminder for next month of replacement. Breville recommends replacing the filter after 3 months.
- Insert the filter into the two parts of the filter holder and push down to lock in place.
- Fill the water tank with cold water before sliding back into position at the back of the machine and locking into place.
First use
- Press POWER button to turn the machine on.
- Follow the instructions on screen to guide you through first use setup.
- After completing setup, the machine will tell that it is ready to use The machine is now in STANDBY mode.
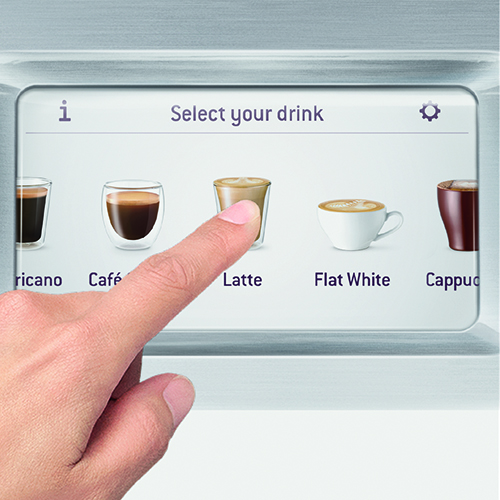
- Touch “Guide” and the machine will guide you step by step to make your first coffee.
- Touch the and go to the Drinks Menu or < to repeat the Setup. To repeat the Guide at any time, go to Settings Menu.
- If your water hardness is either 4 or 5 when tested, it is strongly recommended you change to an alternate water source.
- Place the drip tray grill on top of the drip tray.
- Insert bean hopper into position on-top of the machine. Turn dial to lock into place. Fill hopper with fresh beans.
- Select your drink!
Regarding the water, I always use spring water. I have well water at home, and it is tested and tastes fine, but I have seen better results from less descaling and better tasting coffee using it.
A detailed list of instructions can be found at Breville’s website.
Beans & Grind: Dialing in with Peet’s Major Dickason’s Dark Roast
The nice feature about any coffee machine is you can use your own beans. The Nespresso and Keurig both have a big variety of coffee to choose from, it is still no match for the “grind your own beans” method.
Beans are a decision not to take too lightly. You need to make sure they are fresh and easy to get. The later part was key for me. I did not want to beholden to ordering beans and waiting for them to arrive or have the possibility of them being out of stock. I went with Peet’s coffee beans for a few reasons.
- Peet’s Coffee is readily found in my local markets.
- Peet’s Coffee
has a large variety of flavors.
- Peet’s Coffee has a great reputation for being transparent and socially responsible.
- And they also have a never run out of your favorite cup with a Peet’s Frequent Brewer Subscription
and Free Shipping On Orders $49+
.
It’s not to say I do not use other brands, I do, however, I like to stock up on Peet’s as when you swap out beans you will also have to swap out your dial settings as well. So, before we dive into drinks, we need to dial in your grind.
I am using Peet’s Major Dickason’s, which is a bold, dark roast, ideal for espresso lovers who want rich, full-bodied flavor.
Grind Setup:
- Food scale
- I like this one from Amazon. I use it not only for coffee but for cooking and baking. And it is pretty inexpensive.
- Measuring cup
- Again, you can use any cup, just zero out the cup on the scale or read the measurements on the side. I like this one from Amazon as you can see the ML and OZ on the side and you do not need to measure the weight of it.
Grind Settings:
- Instructions are all based on a double shot. Make sure you are using the single wall double shot filter.
- Start with a grind size around 12–14 on the Barista Touch.
- Use the wheel on the side of the machine or the touch screen to get to a proper grind size.
- Set the grind time somewhere between 16-20 seconds.
- Aim for a dose of 18–19g for a double shot.
- Once grinding is complete, weigh your grinds before you compress.
- Compress and tamp firmly.
- Your espresso should yield 36–40g in 25–30 seconds.
- I try to have the espresso star dripping out around the 7 second mark
- Repeat the process until you get it “dialed in“.
- Adjust the grind finer if the shot is too fast, and coarser if it’s too slow. Tamping pressure should be firm and even.
My final settings for Peet’s were a grind of 14 and a grind time of 18 seconds. That produces 18g of coffee.
Here is a great video of how to really dial in your machine.
Making the Perfect Espresso

Step-by-step:
- Select “Espresso” on the touchscreen.
- Insert your portafilter and press Grind.
- Distribute by tapping the portafilter a bit and tamp firmly.
- Lock the portafilter into the group head.
- Press Brew. The shot should begin after 5–8 seconds of pre-infusion.
- Watch for a honey-like consistency and rich crema.
Customization Tip: Save your grind size, dose, and shot time in a custom profile if you love the result.
Making an Americano
An Americano is espresso diluted with hot water, ideal if you want a longer, smoother drink without compromising flavor.

Step-by-step:
- Select “Americano” on the touchscreen.
- Insert your portafilter and press grind. Distribute and tamp firmly.
- Lock the portafilter into the group head.
- Press brew. Hot water should fill your cup for about 40secs (4-6oz) and then the brew will start.
Tip: Make sure you cup is wide enough to capture the water from the spout and from the portafilter.
Making a Cappuccino
A cappuccino features equal parts espresso, steamed milk, and foam. The Barista Touch makes this almost effortless.

Step-by-step:
- Select “Cappuccino” from the menu.
- Insert your portafilter and press grind. Distribute and tamp firmly.
- Lock the portafilter into the group head.
- Press brew. The shot should begin after 5–8 seconds of pre-infusion.
- Add cold milk to the stainless pitcher (whole milk steams best).
- Insert steam wand, set foam to high and temp to around 140–150°F.
- Steam the milk until you hear that “chirping” sound of perfect texturing.
- Tap the pitcher and swirl to integrate.
- Pull your espresso shot, then pour milk in a circular motion to create foam cap.
Latte art bonus: Practice simple hearts and rosettas by steady, slow pours. I still have trouble perfecting this one.
Cleaning and Maintenance
To keep your Breville Barista Touch running perfectly:
- Purge the steam wand after every use.
- Wipe the group head clean daily.
- Run the cleaning cycle every 1–2 weeks using Breville’s cleaning tablets.
- Descale every few months depending on water hardness.
Final Thoughts
Owning a Breville Barista Touch means café-level coffee from your kitchen, and with the right beans and a few tips, you’ll enjoy a consistently rich brew. Peet’s Major Dickason’s blend complements the machine beautifully, with deep, smooth, and bold flavors in every cup.